My second single lens reflex (SLR) camera was an Olympus OM-1. My first was a Nikkormat, which was stolen from my dormitory room not too long after I got it. After some agonizing over the replacement, I decided on the OM-1, not the least because of the size. I wanted a small camera that I could take everywhere mostly for snapshots. I loved that camera. I still have that OM-1, but it suffered through a flood in my basement in New England and its innards are now in poor shape. I recently obtained a refurbished OM-1 and I am a happy camper. Here is my ode to the OM-1.
Controls
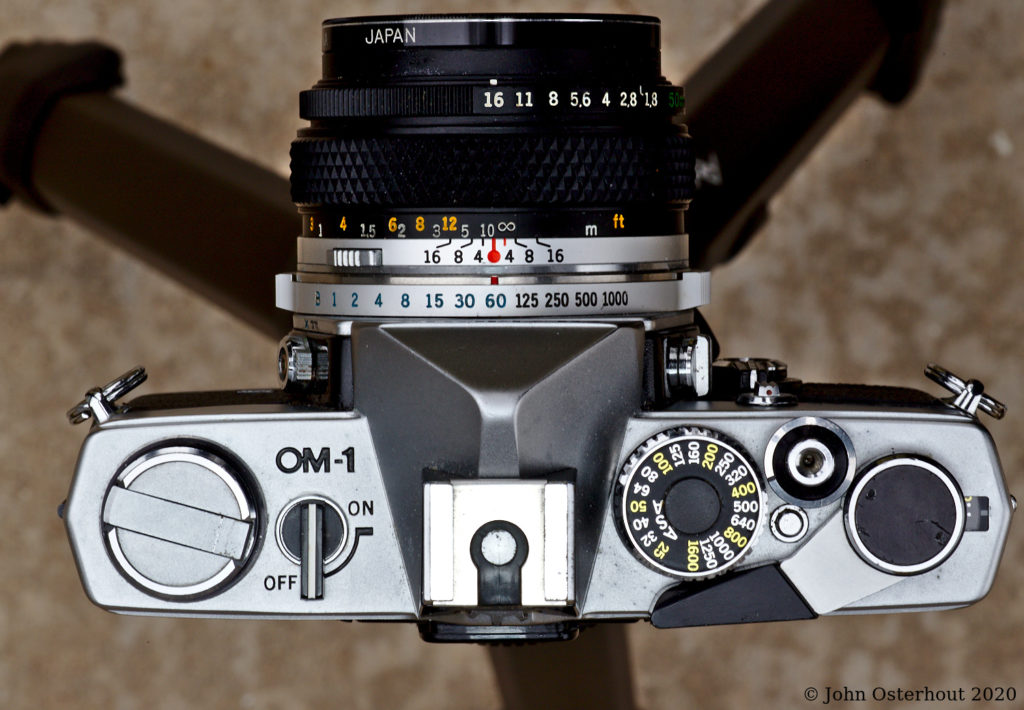
It is not my intention to review the OM-1, but it might be handy to get the lay of the land. So, If you would look a the Top View, you should be able to pick out the rewind crank on the left (the actual crank is folded up, so you can’t see it) and the film advance lever on the right. The shutter release button is above the film rewind lever. The ON-OFF switch is for the match-needle light meter. Nothing else needs a battery. The dial that you might think is the shutter speed dial if you are familiar with film cameras is actually used to set the film speed. Notice that it is marked “ASA”. This is what we used instead of “ISO”, back in the old days before cell phones, the internet, or even electronic calculators. Yes, I am an olde fart. The little button in the crook of the film rewind lever is the “film speed dial release button”. You have to mash this little button in order to change film speeds. The shutter speed is controlled by a ring on the camera behind the lens. In the photo, the shutter is set to 1/60, which is blue because that is the flash sync speed. The aperture is set with the ring on the front of the lens. It is set to f16.
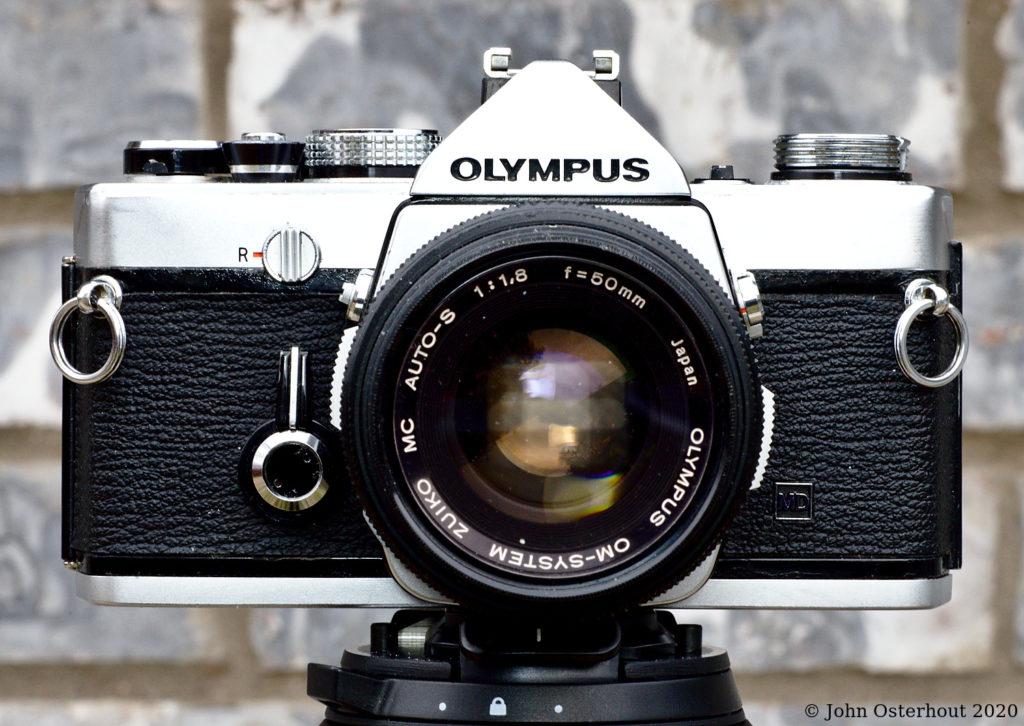
If you glance at the front view, you can see on the left side of the photo: the film rewind release lever (next to the red “R”), the self-timer (black lever with a white stripe), and the mirror lockup lever. On the right hand side of the photo is the flash synchronization socket. The two knurled bars sticking out on either side of the lens are attached to the shutter speed ring.
Size
One of the major reasons I chose the OM-1 was its size. How small is it? Here is a shot of my OM-1 next to a Leica IIIc (a relatively tiny full frame camera, also a rangefinder so it doesn’t use a mirror and a prism). Further down, there is a second shot next to my Canon 6D.
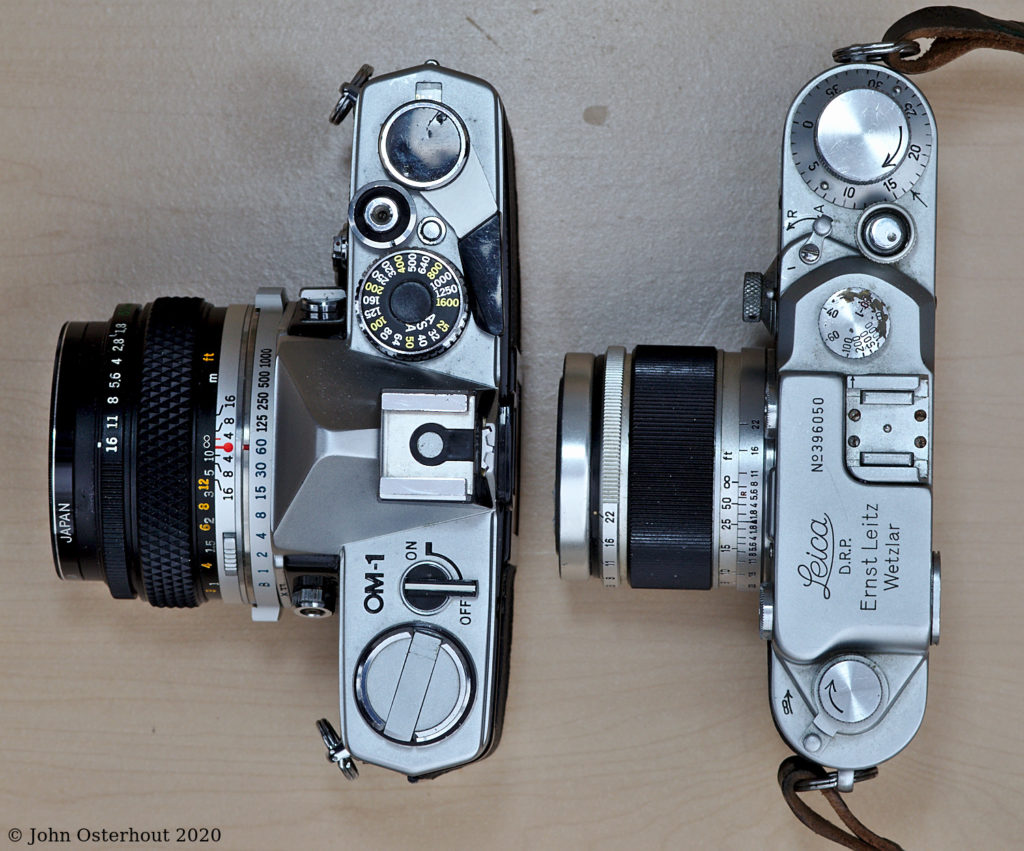
The Olympus is larger than the little Leica IIIc, but only a little. The weights are similar as well. The OM-1 is an all-metal camera with mechanical innards. It is small but has a reassuring heft. It is easy to carry all day. I’ve taken it on many a backpacking trip and been out with it for days.
The Leica IIIc is wearing a Canon 50mm f1.8. This IIIc was manufactured in 1946 and purchased sometime thereafter by my father-in-law. It originally wore a Leitz Elmar 5 cm f3.5. The Elmar that was with the IIIc has a bad scratch and was likely replaced with the faster Canon lens some years after the camera was purchased.
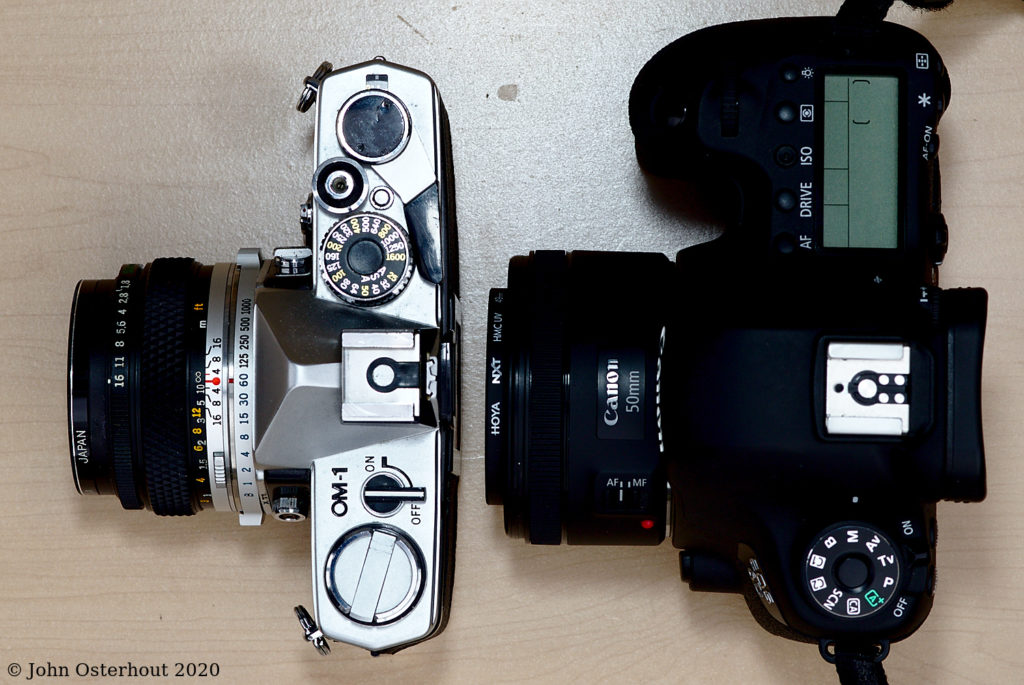
Here we see the OM-1 and the Canon 6D. Both are full frame cameras and wearing their 50mm f1.8 standard lenses. There is a noticeable difference here. I would not call the 6D a monster compared to the OM-1, but it is a side-panel van to the OM-1’s two-seater ragtop. I have carried the 6D fairly comfortably all day long with the 50mm f1.8 (as shown in the photo) as well as heavier lenses, but a wide camera strap and good posture certainly help.
How to operate the OM-1.
After step two below, repeat steps 3-8 until you run out of film.
- Put in a roll of film.
- Set the ISO.
- Set the aperture or the shutter speed.
- Set the other one. (It’s good when the needle in the viewfinder is centered.)
- Focus
- Frame
- Press the shutter release.
- Flick the film advance lever.
The order of these steps is somewhat flexible, but steps 3-6 should definitely be done before step seven and step eight definitely comes after step seven.
Controls of the Canon 6D.
You can take pictures with the Canon 6D but you have a lot of, well, stuff, along for the ride. By my count, the 6D has 4 rotary dials, 18 buttons, 3 selector switches, and a display in the back that will show you 15 screens worth of options. The screen in back also gives you views of your shots. The 6d can take nice pictures and I do very much enjoy using it. But really, eighteen buttons? Eighteen? When I took up serious digital photography, which for me started with the 6D, I was struck by all the Sturm und Drang. With the OM-1, after you set the ISO, all you have to worry about is using the focusing ring and setting two controls for the exposure. Photographs result.
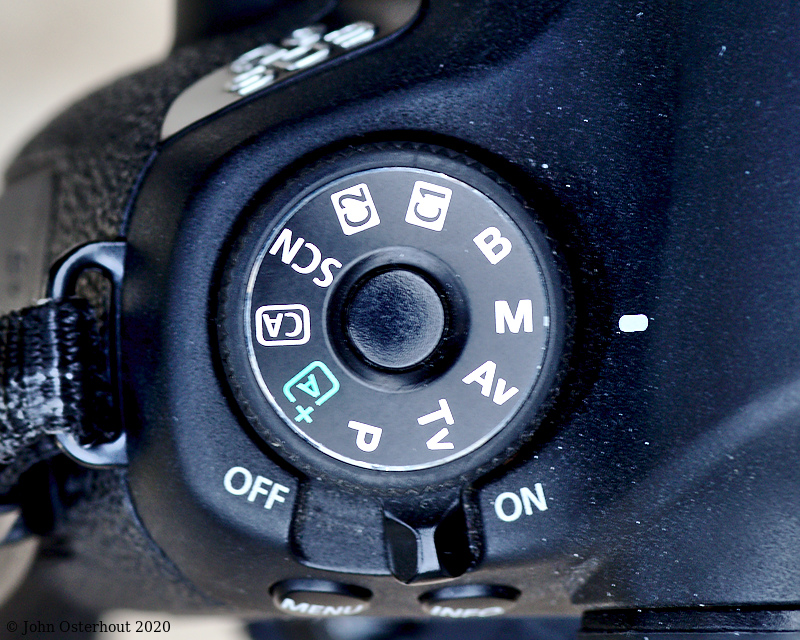
One of the rings on the Canon 6D is the mode selector, which has ten modes. I tried to use the modes on the mode dial of the Canon 6D. I really did. But I kept thinking, “Why is it doing that?” I kept wanting to use exposure compensation but it was buried in a menu that I would have to find while I was in the grip of my creative throes (bummer). I kept longing to just be able to twist the shutter speed or aperture rings to where I wanted them. I finally gave up and set the mode to “M”, where I can adjust the exposure at my will. The mode selector stays on “M” on both my digital cameras pretty much permanently now.
What about modes?
(I can’t live without my modes…) Mode options just represent variations on how you set the shutter and aperture. So…
Aperture Priority on the OM-1
Set the f-stop that you want. Fiddle with the shutter speed until the needle of the internal meter is where you want it. Aperture priority.
Shutter Priority on the OM-1
Set the shutter speed that you want. Fiddle with the f-stop until the needle is where you want it. Shutter priority.
Program mode on the OM-1
Consider the lowest shutter speed you can use with the lens you are using to avoid blurring the picture due to camera shake. Take into account the particular properties of your camera regarding mirror slap and adjust the minimum accordingly. Consider the depth of field you need: foreground and background both important? or do you want to focus on the eyes and let the rest of the portrait go soft? Are you going to have to make exposure adjustments because the subject wearing a white dress or are they backlit? Sometimes there is no combination of settings consistent with goals and lighting, then get out the tripod, make a mental note to use a film with a more appropriate ISO, or use a flash unit. Program mode. Only better.
A Note on Focus
The OM-1 is never going to focus for you. This means you are going to get the focus where you want it – every time, unless, of course, you goober up. I see this as a tremendous advantage. One of the problems with the 6D and 6DII is getting them to focus where I want. The 6DII uses a grid of a zillion focus points. When you push the shutter release down a little it focuses until some of it’s points light up. Then it’s done. If the focus area isn’t where you want it, then you have to defeat the mechanism. The 6D has a special button that calls up the grid and let’s you select the focus points you want to use. This works OK, but I feel like I have to defeat the opinions of the camera to get what I want. You can use manual focus, but that’s a whole other set of folderol. Don’t get me started.
Your battery runs dry
On the 6DII a dead battery means you are dead in the water. Uh oh. With the OM-1, no worries, every single shutter speed and every single f-stop on the OM-1 will work just fine with a dead battery. The OM-1 will focus just fine, too. You wouldn’t even know the battery was kaput except that the needle in the light meter doesn’t doesn’t move. Solutions: 1) pop in your spare battery and you’re good for another year, 2) switch to your hand-held light meter (You do have a hand-held light meter, don’t you?), or 3) use Sunny 16 (Real photographers don’t need light meters anyway, at least not in the daylight!).
Defeating the mechanism
One of the annoyances of beginning to use a fancy-schmancy digital camera like the 6D is that it is easy to push a button or bump a lever and accidentally have the device go off into some unknown state that precludes photography and requires trouble shooting. This always happens when you are in a creative frenzy (yet another example of Murphy’s Law.) It is most annoying. The OM-1 has never refused to work because I hit the wrong button.
Verging on Philosophy
I find the Canon 6D very useful, a good camera. I can use it to capture images, sometimes even good ones. However, when I’m working with the OM-1, it just feels right. Life is simpler and I spend more time thinking about my shots than just ripping off pictures. When I shoot the 6D, I snap, then look at the back to see the preview. I make adjustments and go again. I’m more inclined to snap and then worry. I almost always take multiple shots of the same scene. With the OM-1, I think about the shot, adjust the camera the way it needs to be adjusted, and shoot. Sometimes I find myself thinking, “I nailed that shot, no need for a second.” Now when I use the 6D, I’m trying to unlearn my bad digital habits and bring some more thinking back to my digital photography.
In Conclusion
I like the OM-1 because it has everything you need, and nothing you don’t.
For More Information
I do not intend this post to be a review of the OM-1. There is a lot of information available on the web. Here are some links:
- Casual Photophile
- Emulsive
- Shoot It with Film
- Film Phototgraphy Project
- Lomography
- MIR – See also Zuiko lenses at MIR: Zuiko.
The photos of the OM-1 and the Canon 6D were taken, ironically, with a Canon 6DII wearing a Canon 100mm f2.0 lens. I took some with an extension tube and I used fill flash on the shots. As usual, the photos were processed from RAW files using Darktable, which is free software for Windoze, Mac, and Linux. I used Ubuntu Linux.
Cameras! Cameras! We don’t need no stinking Cameras.
You ain’t seen nothing yet!