If you have just finished your new blockbuster and are ready to get it in print, then you owe it to your book and to yourself to produce it in the most professional manner possible. Since you might not have recently won the lottery, you might not want to throw money at the problem. Doing it yourself seems like the thing. This post is about avoiding some amateur mistakes in book interior design.
Let’s start off by looking at a bad book design. In the figure below, I show the second chapter of my new, soon-to-be-a-best-seller book, “No Dog in This Fight.” I’ve seen self-published books that look just like this. If you want an extended example as a .pdf file click on bad_example.pdf.
Tips to Avoid That Amateur Look
- Don’t use “Times New Roman” for your font (like I did in the example.) This screams “I used a word processor to produce my book” and “I don’t have much imagination.” It’s a good idea not to use Helvetica, or Ariel either. There are lots of free fonts available. Do some reading, find some suitable fonts, and make a beautiful book.
- Don’t use the Tab key for paragraph indents as I did in the example. If you use the default tab setting, it produces an indent of 0.5 inches. Instead of the tab key use paragraph styles to set up your paragraphs (more on this later) and for the first line indent set in a number equal to the font size you are using. So a 12 point indent with a 12 point font. If this looks a little small to you, add a point at a time until it looks just right.
- Don’t put extra space between the paragraphs. This is an internet thing. The vast majority of professionally produced print books do not have space between the paragraphs. The indent serves to specify the beginning of the paragraph.
- Don’t indent the first line after the title of the chapter. The chapter title marks the start of something new, a paragraph indent is not needed.
- Don’t start your numbering with the front matter. Before you get to chapter one, there should be several pages of front matter. These pages would include things like the title page, copyright page, blurbs (if you have them), and dedication. In the example, bad_example.pdf, there were four pages of front matter so chapter one starts on page five. Chapter one should start on page one.
- Don’t put the page number or running head on the chapter title page. I’ve seen exceptions: some books have the page number on the chapter pages, usually centered at the bottom, but most do not.
- Don’t put page numbers or running heads on blank pages before chapters. A left hand page without text before the chapter page should be blank.
- Don’t use “ragged right” text. Almost all print books have justified text.
- Don’t skimp on the white space on the chapter pages. Most print books start the text of the chapter 1/3 to 1/2 of the way down the page.
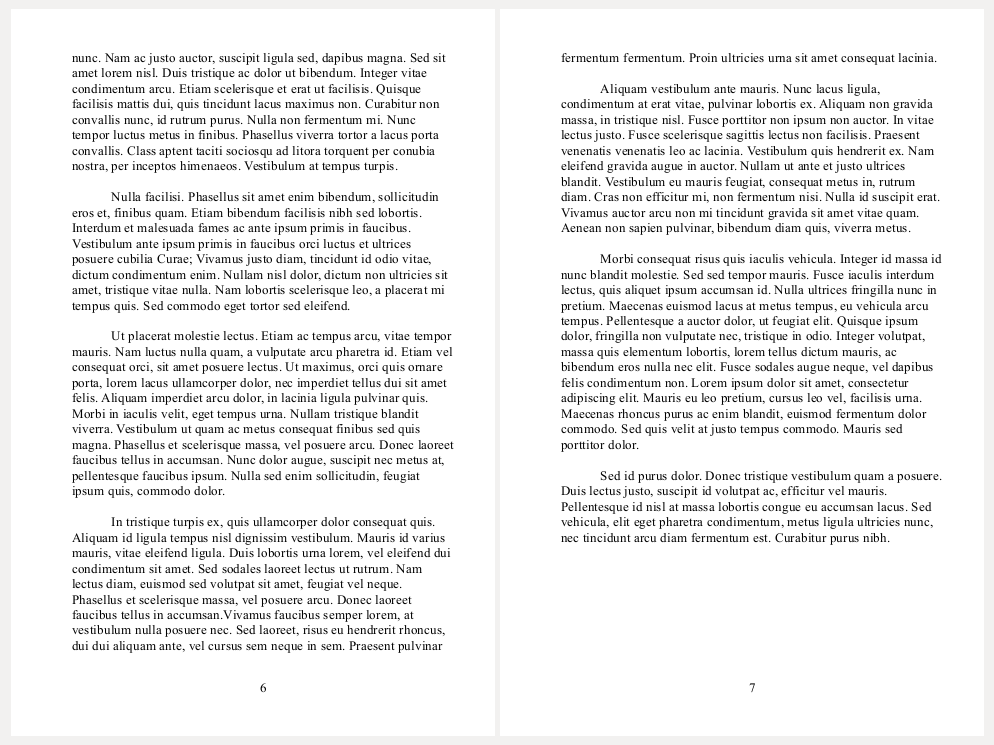
Here is an example of two interior pages badly formatted:
- Don’t forget the running heads. Fiction books usually have the author’s name in the header of the left hand pages and the book’s title in the header of the right hand pages.
- Check for widows and orphans. The Chicago Manual of Style defines orphan as the first line of paragraph stranded at the bottom of a page. A widow is a short last line of a paragraph at the top of a page. The line at the top of page 7 is a widow. You should edit the text or adjust the spacing to get rid of widows and orphans.
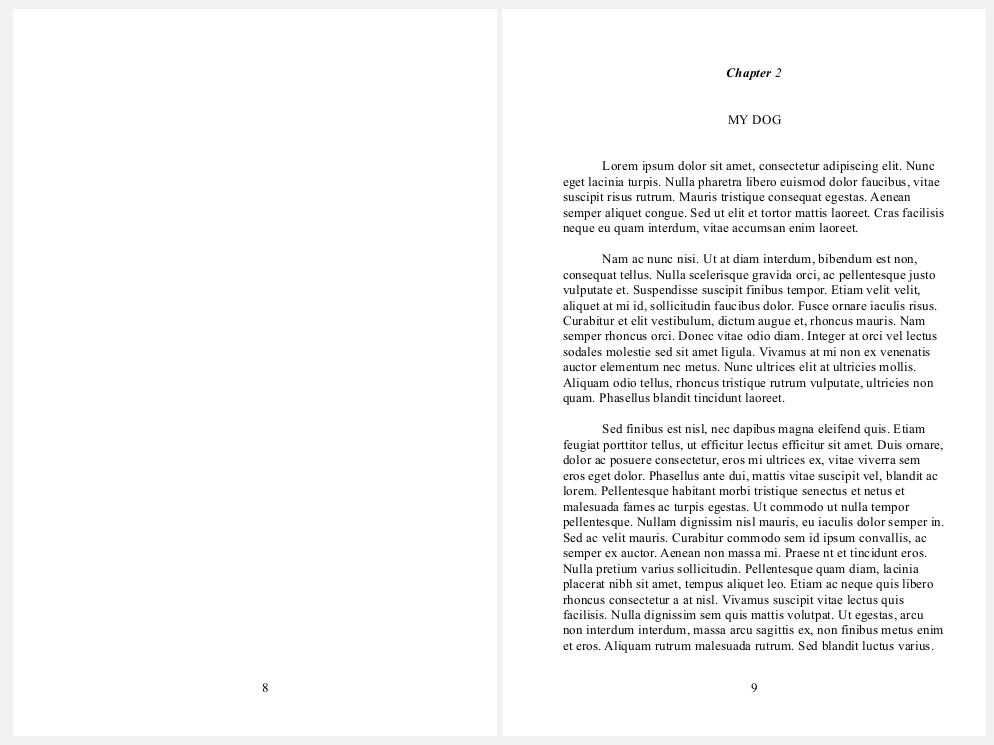
I don’t recommend formatting your print book with your word processor, but if you must, you can (really, you must) do a much better job than the preceding example. Below is an example of “No Dog in This Fight” formatted with LibreOffice to look a little more like a book. To download the whole example, click here: No_Dog_in_This_Fight.pdf.

Notes on the new design.
- The font is not “Times New Roman”. There are just two typefaces, both available free. On the paragraph title page the fonts are:
- The body text is EB Garamond 12 in 12 points from fontlibrary.org (free).
- The chapter title is Latin Modern Sans (LM Sans) from fontsquirrel.com (free) in 24 point bold.
- The chapter number is LM Roman 12 (fontsquirrel.com) in 18 point italic.
- No tabs! The paragraphs were formatted using styles.
- Paragraph styles: Paragraph no indent (first paragraph after the title), Paragraph indent and Paragraph drop caps, which I used on Chapter One just because I could. Note: use the same paragraph style throughout. I just used drop caps as an example!
- Other paragraph formatting information: indents 12 point, fixed line spacing (leading) 16 point (the rule of thumb is 1.2 – 1.45 em, this is 1.33 em), hyphenation is turned on in the paragraph style. These parameters gave 74 characters per line. Readable is 50-80, optimum is 65. If you wanted to get closer to the optimum, you could use a larger font or increase the outside margin to shorten the line length.
- No extra space between the paragraphs.
- The first line after the chapter title is not indented.
- The page numbering starts with Chapter One. You can see this is the extended example, No_Dog_in_This_Fight.pdf.
- The page across from the chapter title page is blank: no page numbers and no running heads. If there were text on this page, you’d use both the page number and the running head on the left hand page.
- The body text is justified.
- The body text starts about half way down the page.
Here are two interior pages together:
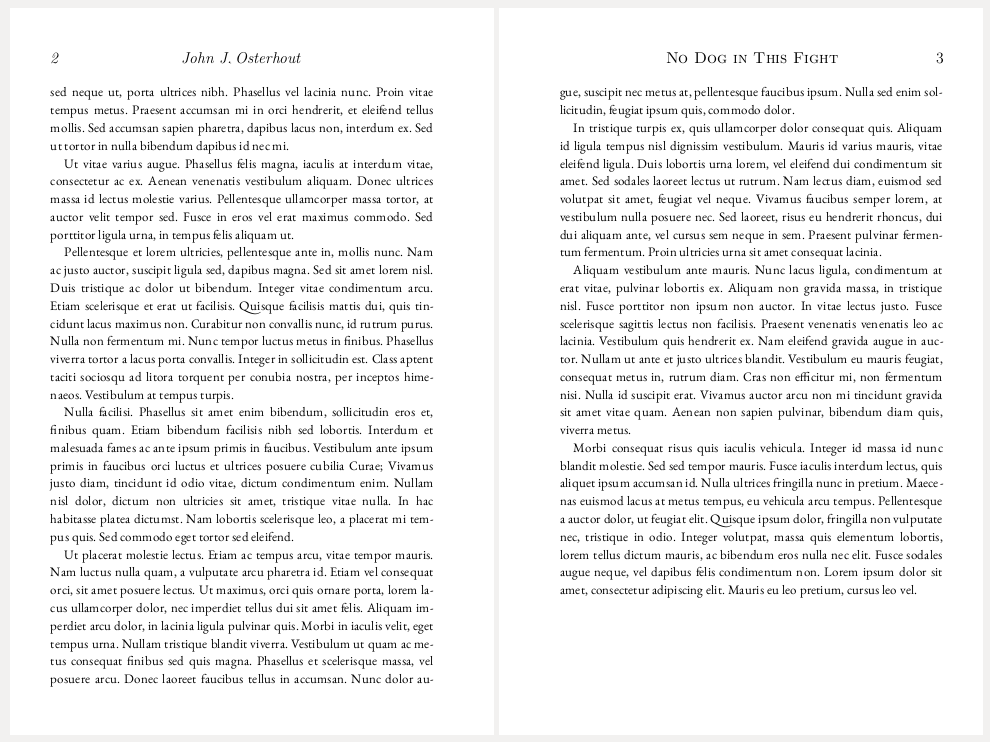
- Note the running heads.
- Left: author name, LM Roman 12, size 14 point, italic.
- Right: book title, LM Roman Caps 10, size 14 point, regular. LMRoman Caps 10 is a small caps font. One reason I chose the LM Roman typeface was that it had small caps.
- The page numbers are in the running heads left and right.
- No widows or orphans. I corrected two short last lines of paragraphs by adding a little extra text. The text is from a lorem ipsum generator so I just added a little to the paragraph. You can achieve the same effect by rewriting. An advantage of using a graphic design program like Scribus is that you have access to more sophisticated tools to adjust the spacing.
In future posts I hope to develop some book templates for LibreOffice that will contain the front matter as well as the chapters. The idea is to be able to dump in your text, output a .pdf, and have a book interior!
After the LibreOffice templates, I’m going to start on some Scribus templates. Check back!
Bravo for the excellent, entertaining exposition on the good, the bad and the ugly book design. Cruise on the wings of a condor.